To reach higher machining precisions, Faro Bearings has enlarged its machine fleet with new grinding machines.
The fleet of machine tools of Faro Bearings has been widened with two new grinding machines, which allow more machining precisions.
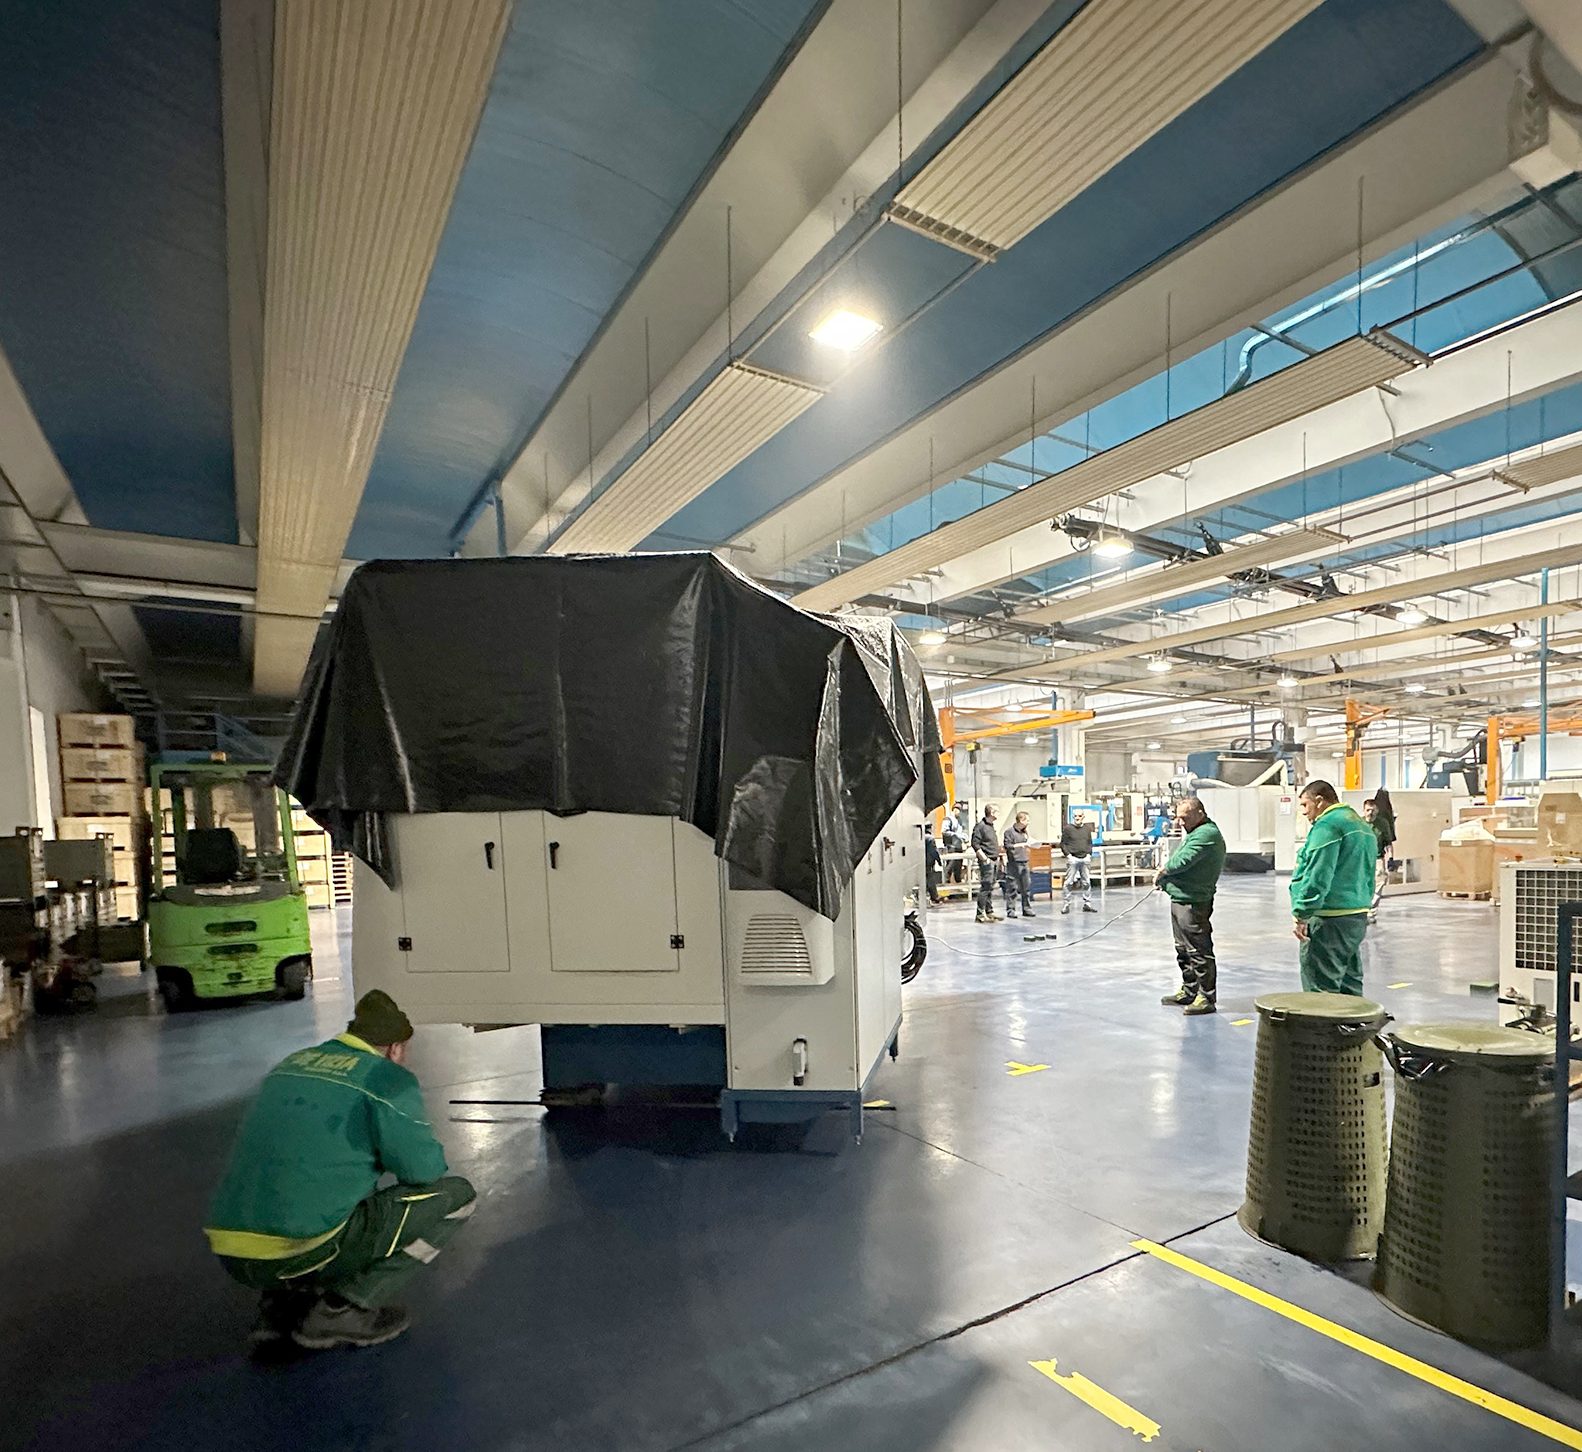
The external OERREPI MTE 400 DRD-R grinding machine is apt for satisfying requirements of very high manufacturing volumes and quality. It is used for the production of rings with diameter from 80 to 400 mm and grinding wheel width of 250 mm. The machine allows the workpiece centring with a pad system that enables quick loading/unloading of workpieces, assuring machining precision and repeatability.
The internal OERREPI MTI 400 DRD-R grinding machine as well enables the workpiece centring with pad system and can machine medium/big size parts that need high stiffness of the primary machine groups and notable work volumes, it is devised for this kind of product and it is used by Faro Bearings for the production of rings with diameter from 80 to 400 mm and grinding wheel width of 220 mm.
The machines are equipped with an automatic robotic workpiece loading and unloading system: once tooled the machines, the operator must simply load the magazines and they perform the machining autonomously.
Gaetano Fiumara, quality and maintenance manager in the testing department, explains the reasons that have led to these investments: «The two new machines are designed to perform machining more efficaciously, precisely and especially faster. The external OERREPI MTE 400 DRD-R grinding machine, in particular, is ideated for the production of counter rollers, with maximum diameters of 400 mm and height exceeding 200 mm. The production of these components currently represents 30% of our turnover; therefore, it is essential to rely on a production capacity able to satisfy the demand. Going into the technical detail, in the grinding of larger diameters than the grinding wheel that the machine can host, the grinding wheel itself must be made to oscillate; vice versa, with the new machine equipped with grinding wheel with 250-mm height, it is possible to carry out the “plunge” grinding without oscillations. This shortens machining times and increases precision».

The special bearing requires control and accuracy
When the special production is at stake, often also made of small batches, the quality control is fundamental. Along the years, the company has been equipped with a test chamber that includes, besides measuring equipment (at the state-of-the-art, as many as 1200 tools are installed), a machine able to control and to calibrate all available equipment. Having to execute measurements in the order of microns, the precision and the perfect calibration of all instruments is fundamental. Faro Bearings Group is specialized in the manufacturing of radial and axial bearings, with cylindrical, conical and ball rollers, which meet the requirements of machine tool manufacturers and several other industrial sectors. Capitalizing the expertise gained along the years, Faro Bearings can design and manufacture, using a production technology with high qualitative standard, special and standard bearings, not easily provisioned on the market.

A new laboratory for the dimensional control
Moreover, since 2019 Faro Bearings has availed itself of a new laboratory taking up 100 sq.m., implemented inside the company’s plant at Calendasco (Piacenza, Italy), in insulated structure with 20°C-controlled temperature chambers in class 1 (with admitted variability of 0.5°C/hour, 0.5°C/day and 0.5°C/metre), separated by an acclimatization chamber.
The laboratory hosts two Zeiss three-dimensional measuring machines that, with different characteristics, have allowed increasing the dimensional control capacity, reaching a diameter of 2,000 mm, and perfecting the shape control of particularly heavy bearings. In Faro Bearings the latter opportunity is assured by the new Zeiss Prismo Ultra, equipped with rotary table, first machine landed in Italy. Bridge measuring machine made of composite carbon fibre and ceramic materials, it uses computer-guided corrections of all dynamic influences on the machine. In this way, the precision during the high-speed piece scanning is optimized.
Moreover, it allows executing measurements with tenth-of-micron precision. Equipped with integrated rotary table resting on air bearings, it matches a perfect motion with a very accurate detection of shape values, and it extends the control possibility up to a diameter of 1,000 mm.
Still with bridge structure is Zeiss Accura 2000, made of steel and aluminium, with control range extended to the maximum sizes of 2,000 x 2,400 x 1,000 mm, provided with active fixed measuring head featuring high precision and stability.
Each detection performed by this equipment is automatically registered in digital modality on the database of the corporate managerial software.
Towards digitalization
In recent years, Faro Bearings is facing a course towards digitalization inside its testing department, entrusted with the qualitative control of all bearings. This digitalization process was born from the need of making production and quality control divisions even more united, facilitating their communication and simplifying the filing of all data collected in the ambit of a bearing manufacturing cycle.
Digitalization consists in the elimination of the whole paper material that was previously used; this drastically decreases the risk of losing documentations and the environmental impact. The goal is creating a database where all stages are registered, with the possibility for the operators on machine board to visualize tables and to fill in documents through tablet. This documentation is stored and remains at disposal on the corporate server for future requirements.


